Would you like to know how to create objectives in Google Analytics effectively for every type of website? Do you already know all the types of objectives that are in Analytics? Well stick around because in this article, we are going to give examples of Goals in Google Analytics so you can implement them correctly. And once you've mastered it, you'll be prepared to insert it for yourself without the need of a programmer, with our article in which we will explain to you what is Google Tag Manager and what is it used for.
Suppose you have an online business (whether a sector that is), and you get X amount of monthly visitors. A part of knowing the typical metrics of “Sessions”, “unique Users”, “bounce Rate”, etc, how do you measure the impact that you have on your customers? How do you know the conversions that end up making the users on your website? How do we get make a Goal Tracking in Google Analytics?
That's why, today, in this article we are going to explain to you how to set up goals in Google Analytics, so that you can implement on your website, blog, e-commerce, digital business...
What are the goals in Google Analytics and what are available?
The section of “Goals” in Google Analytics (also called Goals"), is a section of this tool that allows us to monitor all conversions that we want to measure on our website.
To do so, there are different types of objectives to be able to trackear each of the actions that are taking place in your web page.
How to create and set goals in Google Analytics?
Below, we are going to teach how to define a conversion goal step-by-step:
1. Just enter in the web page Google Analytics, we find the typical tab initial showing the general data of the website and / or blog.
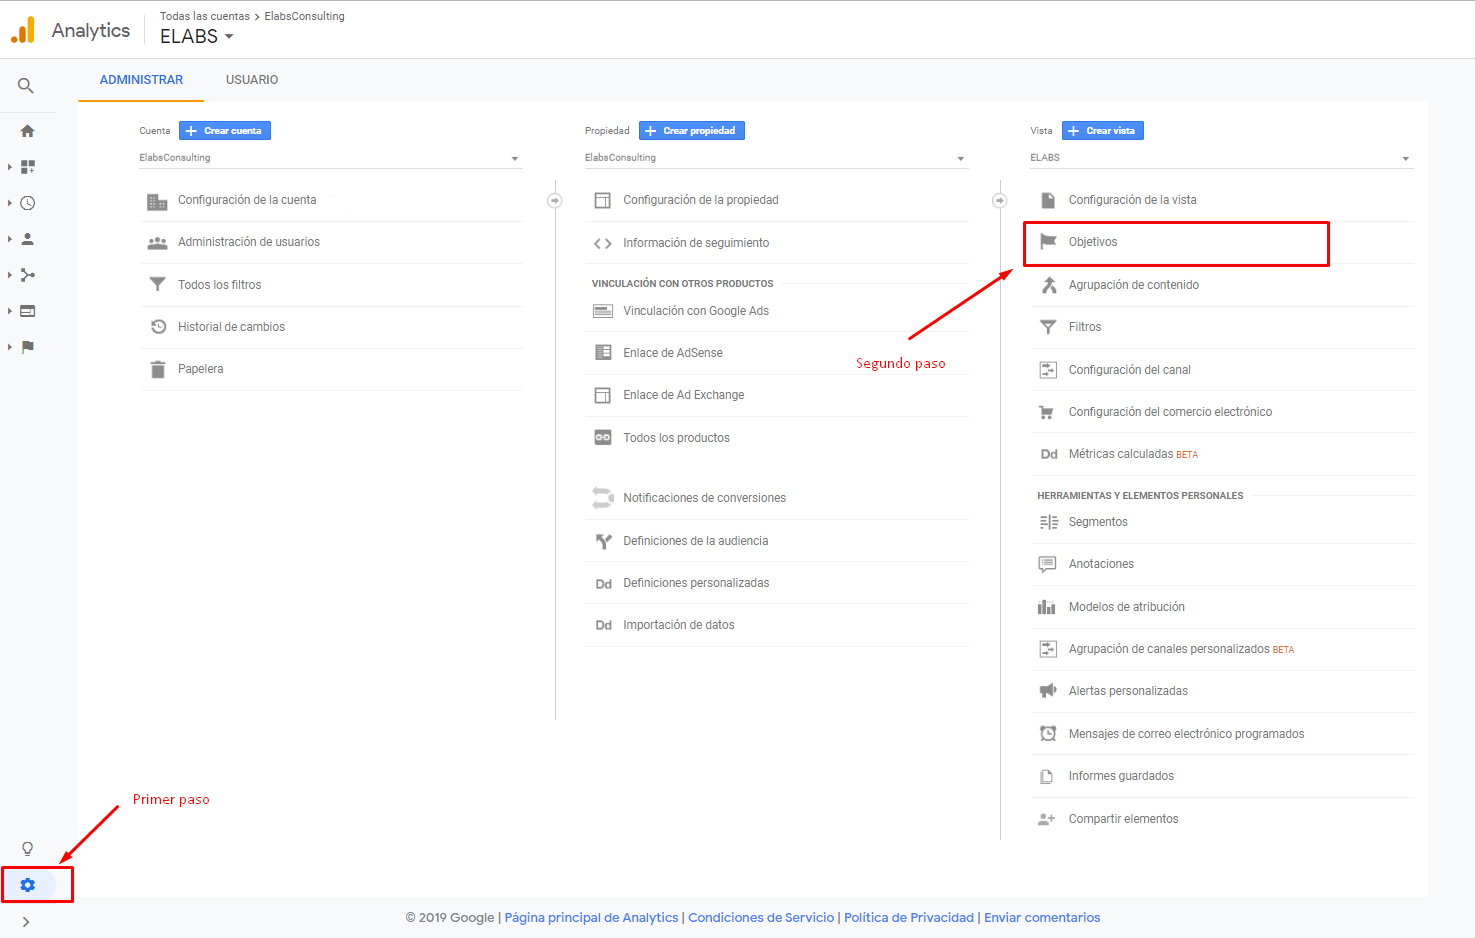
2. Then, we go to the tab “Manage” located to the lower part of the screen to the left. In this section you will see three columns distinct:
- Account.
- Property.
- View.
To go to the paragraph of the conversions we go to the last column of all, in the section “Objectives”.
3. If we have not yet defined any goal, we will see the blank screen, and it will go to the button “New goal” to begin creating the first monitoring of conversion.
4. Once we are in the “Creation of a new goal,” we will appear 3 general steps that you have to fill in with the information that fits in with the conversion to which we want to make the follow-up.
In short, this is us, this screen will appear:
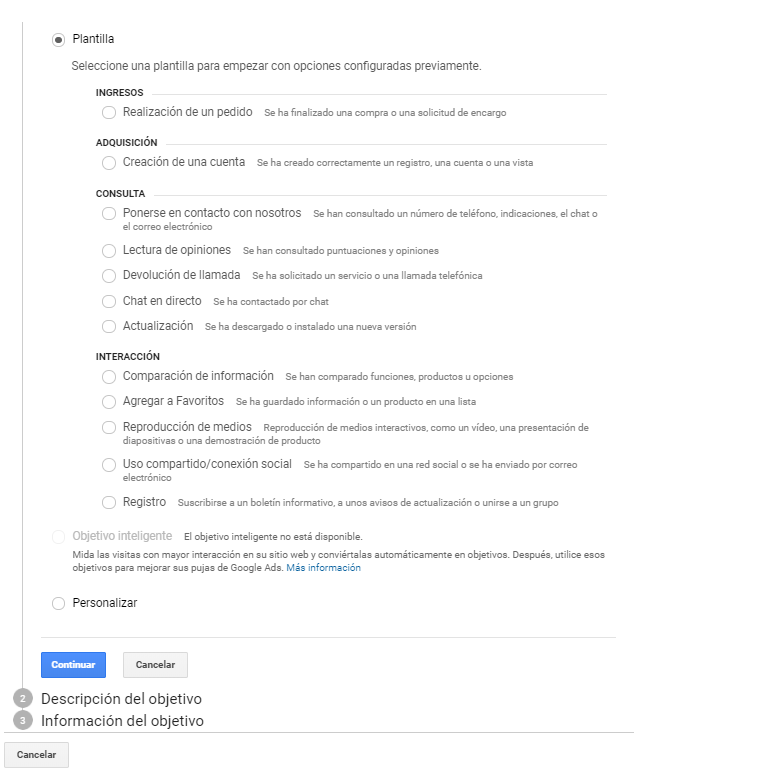
This is the first screen of the 3 steps we have to complete before successfully configure our goal on the web.
Step 1: Setting up the goal
As we can see, Google gives us to choose between two major sections:
- Template(s)
- Customize
In the section, “Templates”), Google offers us the most popular among webmasters, among which may be the same goal that we want to monitor us.
Also, it is not a bad option to use a standard template if you are starting in this area, and even more if you clearly see the goal that you want to trackear.
It can also happen that, among all the default templates that Analytics provide us, do not see the goal that we want to configure. In this case, it will be good to go to the second option: “Customize”.
To do this, you just have to select this second option in the first step and click on “continue”.
Step 2: Description of the objective
Once you have configured the first step, we arrive at the second step: “lens Description”.
In this section, we will have to give a name to the goal that we are going to establish. This name will help us in the future to identify more clearly the objectives that we have.
Below, we will skip over the section of “ID-space target, and we will focus on the section titled “Type”.
This section is, more or less, the method by which we want to monitor the target. As we see, the tool gives us by default 4 of the most common options:
- Destination: this option will be useful if we have a specific page to which the user will get once you have completed any action that we want to complete. This landing page it is, commonly, an information page, and/or a thank you communicates that the transaction has been completed effectively.
- Practical application: the actions that are better suited to this type of lens are:
- Download free e-books.
- Log in or completed forms.
- Duration: this second option is more focused on blogs or pages on which it is necessary for the user to remain at our website. To do this, it would be useful to specify the amount of time that we want the user to be on our site for Analytics we assign as a conversion.
- Practical application: this can be useful to carry out the following actions:
- To know if a user reads our content (in the case that we are a blog).
- To know if you are interested in our site and is browsing more than X minutes.
- Pages / Screens per session: this option is super interesting, despite the fact that it is undervalued by the majority of webmasters. Allows us to know the number of pages a user views in a single session, very useful information if the type of web that we have many screens for which we want the user to pass.
- Practical application: sites that are interested in set with this goal are the function of the following form:
- Have implemented a strategy of bound internal acurada (the more screens, the more useful this will be linked to internal).
- Sites that have a dynamic system of steps. Ex: create systems in which the users will be completing a process by steps.
- Event: this last option includes all the remaining stock that we may not monitor any other way. Although normally, this conversion is attributed to the action more dynamic, we can also use it for static settings.
- Practical application: the sites to which we can fit this option are those that have this kind of actions (among many others):
- Video playback.
- The click of a button.
- Clicking on an anchor.
- Etc.
Step 3: Information of the target
Once we have clear the type of goal that we want to implement and the way that we're going to monitor, it only remains for us to see how we practice.
- Destination
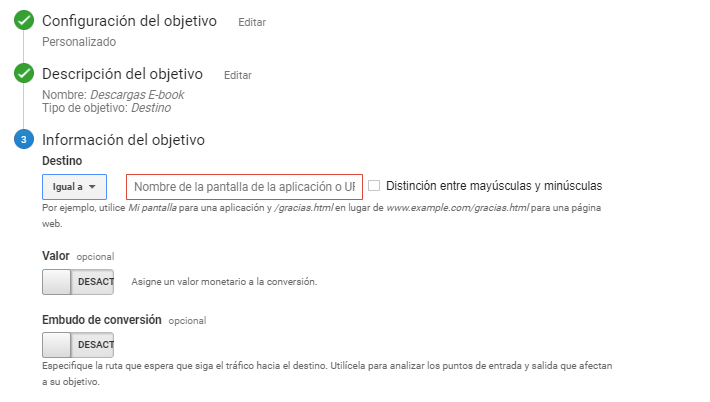
If we have chosen the option of monitoring by a “Target,” only we will implement the URLS that we have created specifically for trackear that goal (to do this, we will leave the option to “Equal to”).
If we have different landing pages landing and all of them have the same root, we can use other options that gives Google Analytics: 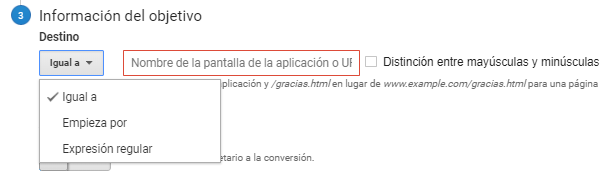
- Starts with: we will have to include the root of the domain + the level above is common to all of the landings (specific example: www.example.com/landings-objetivo/)
- Regular expression: this is going to be very useful when you want to include two or more specified urls. In this case, we will mention using a split with “|”.(Example: www.ejemplo.com/landings-objetivo-1| www.ejemplo.com/landings-objetivo-2| www.ejemplo.com/landings-objetivo-3|)
- Duration
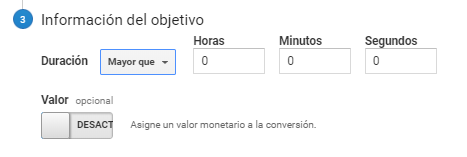
To configure this goal successfully, we must indicate the specific time that we want to measure conversion. This will only allow the option for the conversion to complete successfully when the user gets to be the exact time or more in our page.
- Pages / Screens per session
As we mentioned in the objective of “Time”, in the section “Pages / Screens per session” is exactly the same: we must specify the number of pages per session, consider that the user has made us.
- Event:
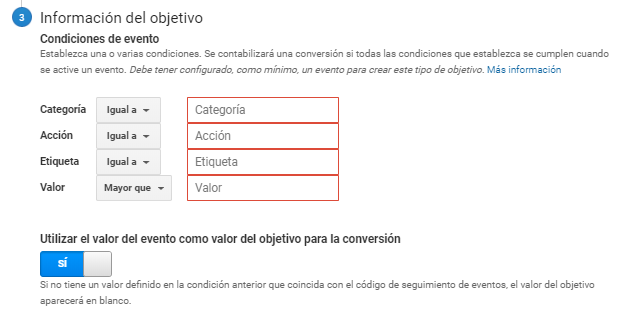 Finally, we come to the last goal, and perhaps the most complex for many webmasters. When we work a control of a lens in the format event, we assign different values in each of these sections:
Category: this field is required (Example: “Ebook” or “Video”).
Action: this field is required (Example: “Download” or “Play”).
Label: this field is optional (Example: “The 10 best viewpoints of Spain”).
Value: this field is mandatory, and you must specify how much it is worth this conversion (Example: 1).
After filling the fields in Google Analytics, we will implement the data in the following code (which we will insert in the event (button, video,...) in the code of the web).
Code template:
(onclick="gtag('event', ‘Name of the Action‘,
{‘event_category’: ‘Name of the Category‘,
‘event_label’: ‘Name of the Label‘,
‘value’: ‘Number of value‘})

